I've been playing around with my painted finishes for the past couple of years.
I think I'm finally getting the hang of it.
I wanted the look of layers of paint, naturally worn down over time.

So....
this is how I did it.
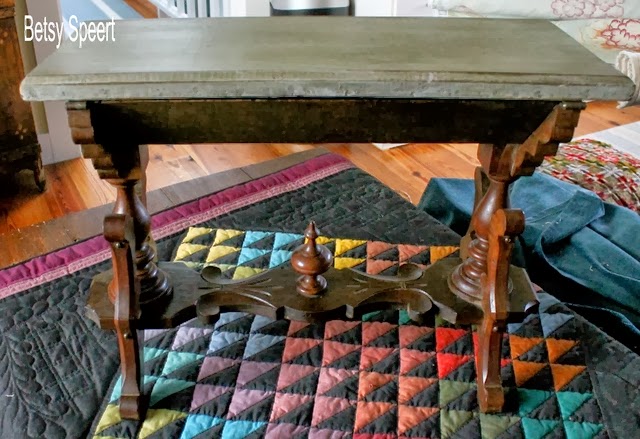
But wait, let me show you the whole project I did on this little table that I reinvented for Miriam and Ross's living room.
Remember?????
I had decided to give them a little bench I had hanging around down in my basement.

I brought it over to their house to try out in the living room, and decided it was the perfect size to go next to their sectional.
I figured that it would be a simple little project.
Nothing is ever simple!!!!!
WHEN WILL I LEARN?????
I planned on stripping the cover off the top, and transforming it from a bench into a table.
.JPG)
I figured it would be easy to strip the fabric off the top.
.JPG)
.JPG)
I figured that there was only one layer of fabric that had been added after the original design, and that this had once been a table.
.JPG)
I figured I could get the fabric off in 5 minutes.

I figured wrong.
This seems to be a theme with me.
OY, OY, OY.
First, I took the top off the hinges.
Then I used my trusty stripping tools to remove the tapestry fabric.
.JPG)
WHAT?????
There was another layer under the tapestry, and this one was put on professionally with a lot of tacks.
It was probably original to the piece, from the Victorian era.
I'm guessing the late 1800's.
I'm guessing the late 1800's.
.JPG)
I took a picture of all the stuffing from inside the cushioned top.
It was straw.
It was dusty.
It was disgusting......
It was straw.
It was dusty.
It was disgusting......
.JPG)
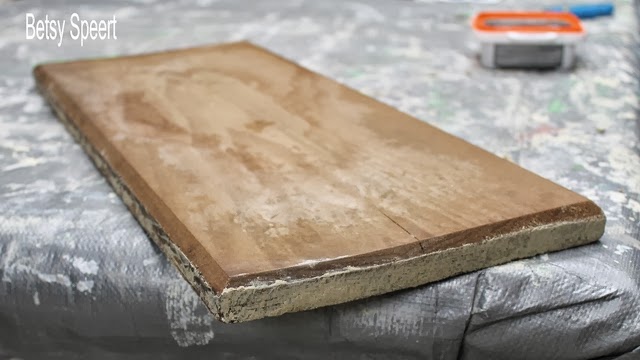
I had figured that the top had originally been a table, and would be a nice piece of wood.
I am wrong so often.
Poor Betsy.

All the tacks left the sides of the top a mess.
I am wrong so often.
Poor Betsy.

All the tacks left the sides of the top a mess.


There's a fun little compartment under the hinged top that will be a great place for Miriam and Ross to store their remote controls.
.JPG)
I placed the top back on the base, just to get a sense of what it would look like if I ever finished this project.

Then I carried the top down to my basement painting studio, and prepared it for the paint.
I filled the holes on the sides with wood filler.
I filled the holes on the sides with wood filler.

This stuff is great, and so easy to work with.
.JPG)
Then I sanded the wood filler down.
.JPG)

Then I mixed together the first application of paint.
I combined Annie Sloan Coco and Olive.
I combined Annie Sloan Coco and Olive.
.JPG)
I gave the top one coat.
.JPG)
Once it dried, I wondered if I should just keep it that way.....
.JPG)
nah.....
I wanted more of an effect.
So, then I decided to start layering on the color.
The next color I wanted was a purple, so I got out more paint to mix it up.
.JPG)
I first mixed the red with the blue.....
it was a little dark....
so I added in some white....
it was a little pink....
so then I added in more blue!!!!!

I drybrushed the purple over the green.
.JPG)
Then I dry brushed some blue over the purple, and rubbed it in some places with a paper towel.
.JPG)
Then I drybrushed some Chateau Grey over the blue and purple and green.....
.JPG)
.JPG)

Then I waxed it and then dark waxed it.

Then I distressed it with fine and coarse sandpaper.

You can't tell in these pictures, but all the colors show through in subtle layers.

Wait!!!!!
I set my camera different!!!!!
Is this better?????
.jpg)
Once I sanded the edges, the light wood showed through, so I added a little dark wax to the raw wood.....

Then I used Walnut Briwax on the wooden base to darken the orange of the original finish, and give it a little more pizzazz.
Here's a side by side!!!

So,
now all I need to do is bring this back to Miriam and Ross to put next to their sectional.
Those kids are soooooo lucky!!!!!
On that note,
Latah, Gatah

0 comments:
Post a Comment