The last week has not been very 'progressive' for our Kitchen Renovation.
Nothing major, just the usual delays on delivery and such, plus to top it off, the carpenters working on the project got sick one after the other!
That really slowed down the work for sure.
Still, despite some setbacks, here is what has been done so far...
 |
| Refrigerator Cabinet is up! |
 |
| Looks great! |
This cabinet took a while to finish. And there are a couple of reasons why.
First of all, the original plan was to cut out some of the dry wall on the back so we can push the refrigerator further back. I wanted my ref to have the 'built-in-look' without having to replace it. However, when the carpenter cut a section of the back, there were several pipes, communication lines and electric lines that ran thru it. The lines were not a major problem. The pipes were. They could technically do it, but would cost me way more & delay as by a week or so.
So we decided to just leave the dry wall be and just put a brace on the wall for the cabinets up top.
We needed to put a brace since if we didn't the cabinets would just recede towards the back. And I didn't want that. I wanted the cabinets to cover the whole refrigerator top. So they had to build the brace then set the cabinet.
Another problem we encountered was this...
 |
| Looks good now |
Somehow, my refrigerator was leaning towards the back, hence the alignment with the cabinet did not look good from the side. So the carpenters placed boards behind to make it align just so. Let's just say, it probably took them five tries to get this baby looking this way! Hew!
 |
| Beam added for the molding |
I wanted the crown molding to go all around the room and to prepare for that, we had to add this beam on the hallway to make the molding flow seamlessly throughout the room.
 |
| New floors for the Powder and Laundry Room |
The Floors in the Powder room and Laundry room was also completed this week. These two rooms are directly adjacent to the kitchen, with the same floors as well before, so I chose to redo it too!
I chose Vinyl tiles that mimic Travertine tiles. I love them, great on the feet and looks beautiful and more contemporary. :-)
 |
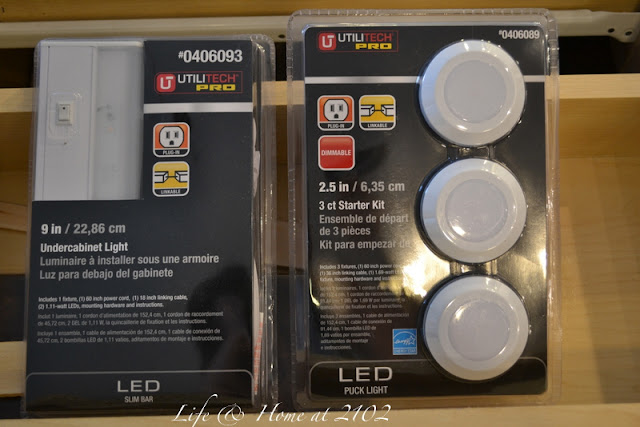
| Cabinet Lighting |
I also finally got our cabinet lighting. We chose to go with LED since almost all the reviews and blogs say to got for LED since though it costs a lot more up front, it does last way longer, and plus the lights look better. We'll see...;-)
I aslo had HINGE Trouble.
Remember my Pantry cabinet?
 |
| The plan |
I originally wanted something like this...
 |
| source |
 |
| source |
However, though we planned on putting ice box hinges, the actual hinges itself would look too big for the doors and the offset not exact on my cabinet doors.
If I insisted on putting these hinges on my pantry doors, my doors would have hinges that almost touch each other and we would have to put an extra brace on where we'll need to mount them! Aaaaaggh! Too much trouble for something that may not even look good on my cabinets! Another big reason why I have to change is the cost - $270/hinge (Wilmette Hardware)!!
I am NOT going to pay that much for a hinge for sure!
There were other more affordable choices like this one...
 |
| $18.50 each |
I was so excited to get this last week too but alas, this could not fit my doors!!!!!
This hinge has a 3/8" offset which I found out, from all the several hardware sites, was the offset for most antique and antique reproductions for this type of hardware!
My cabinet doors are not flushed in, they are supposed to be mounted out and the offset is about 3/4"!! The carpenters and I have tried to come up with an aesthetically satisfying way by which we could use the hinge above. But we were not successful, so now I'm choosing either of these two armoire hinges...
 |
| $4/hinge from Menards |
 |
| $3/hinge from Home Depot. |
I plan on using these handles...
 |
| Goes on the glass cabinets on top |
 |
| Goes on the long cabinet doors |
Yup, I'm going for brass/gold with the dark cabinets. I think this extra-bling would just make it look more special.
Anyway, my problems could be worse right? And as of Friday, my vent has finally arrived as well as the wallpaper!!! Yup, there's going to be a wall paper. Will talk about that later on. But for now, I'm just hoping this week will go on more smoothly and faster.
If you want to see the how the renovation started CLICK HERE and what the kitchen looked like before, CLICK HERE.
If you want to see the how the renovation started CLICK HERE and what the kitchen looked like before, CLICK HERE.
How about you? Got any 'horror' stories to share with a renovation you did? Or have you planned for something in your head and did not work out in reality? Would love to hear your thoughts! Please share away...
Have a Nice day!
*VEL*
Linking back to...
JAQS Studio, The Winthrop Chronicles, Savvy Southern Style, Gingersnap Crafts, While they Snooze, No Minimalist here, The Shabby Creek Cottage, From My Front Porch to yours
Homemaker on a Dime
Linking back to...
JAQS Studio, The Winthrop Chronicles, Savvy Southern Style, Gingersnap Crafts, While they Snooze, No Minimalist here, The Shabby Creek Cottage, From My Front Porch to yours
Homemaker on a Dime

0 comments:
Post a Comment